If you decide to make some festive shortbread please do share your pictures with me on twitter. I'd love to see them. Normal Kitchen on Twitter
Showing posts with label picnic treats. Show all posts
Tuesday, 15 December 2015
Festive Shortbread - A Wonderful Homemade Gift
If you decide to make some festive shortbread please do share your pictures with me on twitter. I'd love to see them. Normal Kitchen on Twitter
Wednesday, 26 August 2015
Soda Bread With Cheese and Balsamic Onions
If my twitter feed is anything to go by roughly half the
country could be found baking bread in the days immediately following the
broadcast of week 3 of the Great British Bake Off. Now in our house there is a pretty clear
delineation between the things I am responsible for making – cakes, biscuits,
chilli, the bed – and the things Mr Normal Kitchen takes charge of – seafood
risotto, cottage pie and bread.
I’ve made bread several times in the past but since meeting
Mr NK this has definitely become something I leave in his domain. He loves doing it and has gradually perfected
his technique with his usual grim, unswaying determination. I sort of miss making it a bit though because
I’d like to grow my skills here in the same way as any other baking I do. After watching Bake Off this week I was again
reminded that I have bread experimentation bursting to get out so I decided I was just
going to do it. Mr NK was just going to
have to deal with it!
I’ve never made a soda bread before and this seemed a great
place to start. It’s quick, I already
have all the ingredients ready to go, it’s new to me AND….. Mr NK has never
made one! I pondered for a bit on what
flavours to add and decided on one of my favourite combinations – balsamic
onions and cheese. This was loosely what
Alvin did, although with a different cheese (I just used cheddar as there’s
always some in the fridge) and without the prosciutto. His got high praise from the big scary bear
(Paul Hollywood) so I decided to follow his recipe.
The recipe comes together
very quickly, especially once you’ve got the balsamic onions prep out of the
way. I also made my own buttermilk with
milk and lemon juice as I haven’t found it very easy to source in the past and
this substitute seems to work perfectly well.
I was pretty speedy adding the buttermilk as the dough seemed quite dry
and I should have been a little more patient here. I found bringing it together with a knife and
with my hands gave very different results in terms of how things would combine
and therefore the texture of the dough.
I recommend just getting stuck in with your hands and making a decision
on adding the final bit of liquid after this.
I didn’t wait and got a very, very sticky dough. A bit of flour on the work surface made it ok
to handle but I’m pretty sure it was slightly wetter than it should have been.
That said, it came out beautifully so maybe this was just
right! We started slicing into it when
it was still pretty warm from the oven and ate it soaked in extra virgin olive
oil and balsamic vinegar. It was
heavenly. The flavours were very subtle in mine though so
I’d definitely add more next time.
Probably some garlic and perhaps fresh basil. A stronger cheese like Alvin’s. Oooh the options are so motivating.
I’d call my first foray into soda bread a success and
definitely something I plan to do again soon.
Hurray for finally baking bread J
Tuesday, 7 April 2015
Mr Normal Kitchen's Ultimate Chocolate Brownies
Mr Normal Kitchen is a chocoholic of the first order. In fact I would go so far as to say that I have never met anyone with quite such an obsession. He's also a very big fan of salted caramel and hazelnuts and pondering a different baked treat I could make I decided to concoct something that incorporated all of his favourite sweet things. Oh yes I went there. Meet salted caramel hazelnut chocolate brownies.
I've tried lots of subtly different ways of making brownies over the years but there's one recipe that stands head and shoulders above the rest. It gives the perfect balance between the slightly crusty top and the gooey inner that you should be aiming for. Reliably, every time. Armed with this, a bag of hazelnuts and the unbeatable Nigella Lawson recipe for salted caramel sauce I made a brownie that has been pronounced the best thing I have ever made for my lovely husband. It's hard to convey what high praise this is. He is not an easy man to please.
If you're not a nutter you could leave the hazelnuts out and still get an awesome result. Alternatively I think they'd be great with macadamia nuts instead. Go wild and do let me know if you try them.
Chocolate brownies
3 1/2oz unsalted butter
6oz caster sugar
2 3/4oz dark muscovado sugar
4 1/2oz dark chocolate
1 tablespoon golden syrup
2 eggs
1 teaspoon vanilla extract
3 1/2oz plain flour
2 tablespoons cocoa powder
1/2 teaspoon baking powder
Salted caramel sauce
3oz unsalted butter
2oz soft light brown sugar
2oz caster sugar
2oz golden syrup
125ml double cream
1 teaspoon fleur de sel or sea salt flakes if you can't find it
1 1/2oz hazelnuts
2. Add the cream and the fleur de sel (you may prefer to use only half, up to you) and swirl it all around again. Stir and cook for another minute then remove from the heat and set aside.
3. Now to make the brownies. Lightly grease and line a 20cm square brownie tin. (The lining makes it so easy to lift the brownies out for cutting so I advise not to skimp on this element.)
4. Put the butter, sugars, dark chocolate and golden syrup in a large pan and melt gently over a low heat, stirring regularly until all of the ingredients are combined and the sugar grains have melted. The mixture should be smooth. Remove from the heat and leave to cool.
5. In a large glass bowl beat together the eggs with the vanilla extract (I use my homemade version, naturally). Add the cooled chocolate mixture and stir vigorously until everything is combined.
6. Add the flour, cocoa powder and baking powder to the chocolate mixture and fold in gently until you have a smooth, thick mixture.
7. If your hazelnuts are whole then now is the time to take something heavy to them. Put the hazelnuts in a sandwich bag (one of those slide to seal ones is ideal) and give them a good whack to break them up. On this occasion I used a cocktail muddler :) Now add them to your brownie mixture and give it all a good stir.
8. Spoon 1/3 of your brownie mixture into the bottom of your brownie tin and spread it around. Add a 1/4 of your salted caramel sauce, drizzling it over the brownie and giving it a swirl around if you fancy.
9. Add another 1/3 of the brownie mixture followed by a 1/4 of the salted caramel, and repeat again so all your brownie mixture is used. The eagle eyed amongst you will have noticed that you have some sauce left. Whoo hoo, here's your cooks perks! You really don't need all of the salted caramel for this recipe so use the leftovers to drizzle over ice cream, dip churros in or just eat it with a spoon. No judgement here.
10. Back to your brownies! They're ready to bake now so put them in a pre-heated oven at 180°C fan for 25 - 30 minutes. When they're done the edges will start to come away from your baking paper lining and they'll be crusty on top with a gorgeous gooey middle. Be really careful not to touch the caramel when you get them out, it will be bubbling and burn.
11. Leave to cool completely in the tin before cutting into 16 pieces. Enjoy with no guilt because you and they are awesome.
Tuesday, 4 November 2014
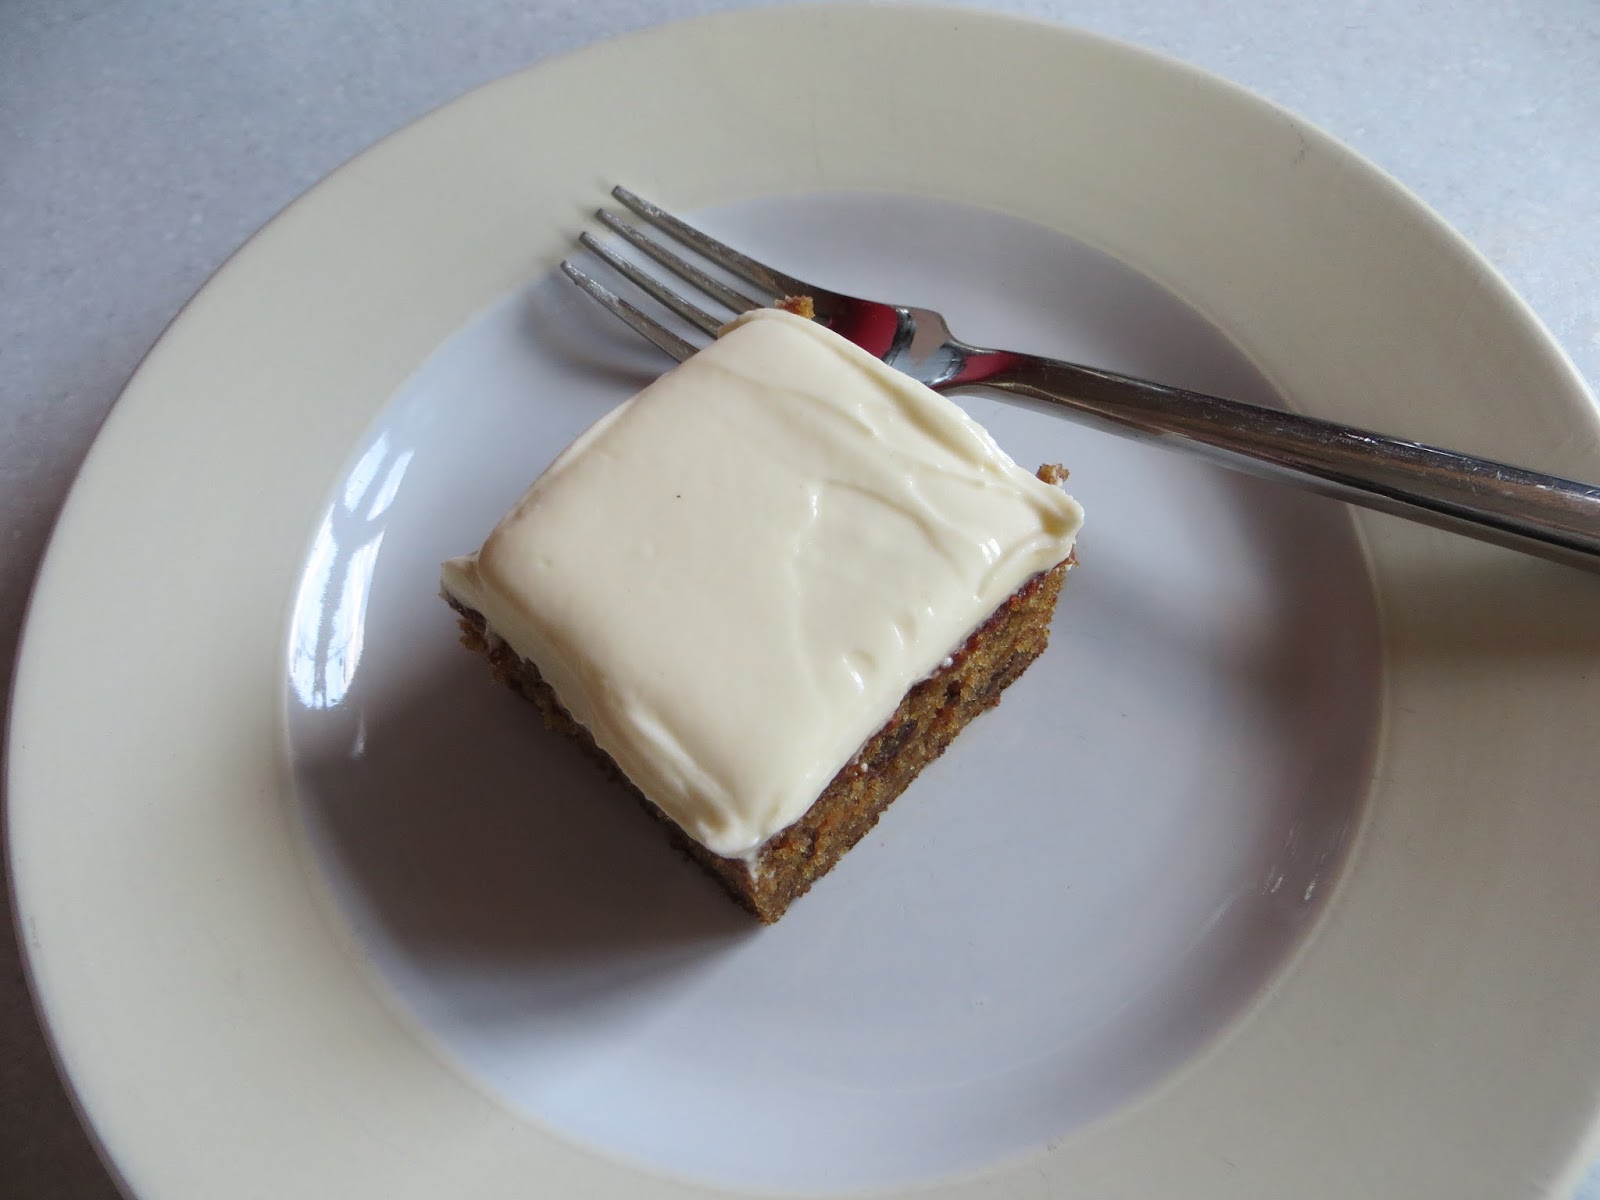
Spiced Pumpkin Cake With Cream Cheese Frosting
Today I've got a recipe for you that was sort of born out of a desire to have just a little bit less wastage when it comes to food and I'm sure it's something that quite a few of you will have had hanging around in your kitchen in the last week or so. Yes it's pumpkin! I adore carving pumpkins but I don't really know what to do with all those innards that you end up scraping out. Mr Normal Kitchen and I went totally over the top as usual and bought the biggest pumpkins we could lay our hands one - one each of course - so by the time we were done there was an ice cream tub full of flesh looking a bit lonely and in need of a home.
Originally I thought about making a pumpkin pie but I didn't have a huge amount of time so I would have needed to buy a pastry case to do this. I didn't really fancy that idea much so I started searching for pumpkin cake recipes. I adore carrot cake and figured this was in the same arena. I found a few recipes but none of them grabbed me completely so I took my favourite bits from a few, cobbled them together and basically made it up as I went along.
I am so pleased with the result! So now I'm sharing it with you so you can also find a good home for some of your scrapings. And I say 'some of' on purpose because unless you make a few of these cakes you're probably going to still have some leftovers!
Spiced pumpkin cake
4oz butter
8oz dark brown soft sugar
2 eggs
1 teaspoon vanilla extract
5oz plain flour
1/2 teaspoon ginger
1/2 teaspoon nutmeg
1 teaspoon cinnamon
1/2 teaspoon bicarb of soda
1/2 teaspoon baking powder
8oz grated pumpkin
3 1/2oz chopped dates
Cream cheese frosting
3oz butter
8oz cream cheese
3oz icing sugar
1 teaspoon vanilla extract
1. Preheat your oven to 200C or 180C fan
2. Put your dates in a bowl and cover them with water to soak. I just left them as long as it took me to make the rest of the mixture so it's only a few minutes but worth doing.
3. Beat together the butter and sugar until totally combined and light and fluffy. Then add the eggs and vanilla extract and beat again. The mixture shouldn't curdle but if it does add a little of the flour to help.
4. Add the flour, spices, bicarb of soda and baking powder and fold in until completely combined. I say this because it's the proper way to do it but honestly I carry on using my hand mixer and my cakes turn out perfectly well.
5. Drain the water off your dates and add them to the mixture along with the pumpkin. Fold in. (I didn't use my mixer here, ha!)
6. Line a brownie tin with baking paper and add your mixture to the tin, spreading it flat and evenly into the corners.
7. Bake in the pre-heated oven for 25-30 minutes. The cake will be a gorgeous golden brown colour and slightly sticky to the touch, mmmm. It also fills the house with an amazing aroma while baking so if you're selling your house here's an alternative to fresh bread!
8. Leave to cool in the tin then use the baking paper to lift it out.
9. For the cream cheese frosting beat the butter until fluffy and then add the cream cheese, vanilla and icing sugar. Beat together until well combined.
10. Spread the frosting over the cooled cake before cutting into slices.
The cream cheese frosting is optional but I found it a great addition to the cake. Alternatively you could serve the cake warm with thick custard for a delicious winter dessert. It's a surprisingly light cake and very moist. Not too rich and dare I say it a nice alternative to sticky toffee pudding occasionally.
In case you're interested here's a little pic of the pumpkin I carved this year too. Happy Hallowe'en everyone.

Wednesday, 11 September 2013
Macarons - For the Very First Time

I came across an American blog written by Stella Parks, a lady who bakes macarons 18 times a week so I figured she'd have a pretty good idea what she was on about. I wanted to follow just one person's instructions rather than mashing a few together and then wondering which bit worked and which didn't. Stella had also gone to the trouble of testing a good number of the things that get blamed for bad macaronage and exploded a number of myths, instead encouraging us all to face up to bad technique when its staring us in the face.
Friday, 28 June 2013
Gooey Flapjacks With a Dark Chocolate Drizzle
Don't you just love recipes that are uber simple to make but taste like you must have slaved over them for hours? Flapjacks definitely fall into this category for me, they're so quick, don't need lots of unusual ingredients and taste like a little piece of heaven.On Saturday afternoon I was planning what food to take on a day at Brands Hatch on Sunday and thought it would be nice to have a little treat in the lunch bag. A quick flick through a recipe book for inspiration and flapjacks hit me as the perfect solution as they're quick to make, I already had the ingredients and they would be easy to transport. An hour later they were all done, did I mention they are quick?
Subscribe to:
Posts (Atom)