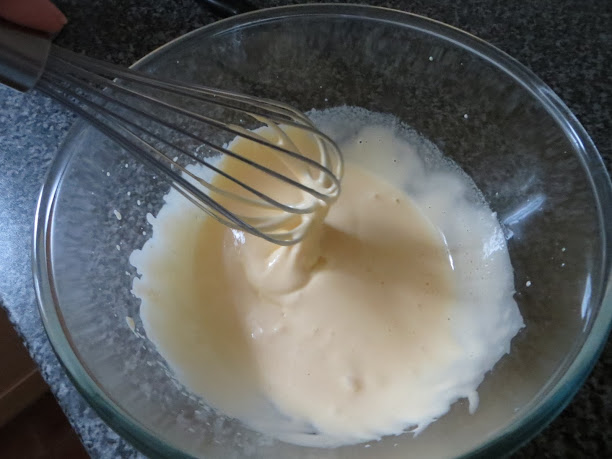
I put the yolks in a large glass bowl with the rest of the sugar and began to whisk by hand. This in itself is a novelty as I almost exclusively use a handheld mixer but I wanted it to be authentic and all the proper chefs use a metal whisk*
*in my head they do, whether this is true or not I don't know


Eventually I felt happy that I had ribbons and also that the eggs had gone a little paler again and turned my attention back to the milk. It wasn't boiling yet so I daringly turned the heat up a notch and stirred it constantly to distribute the heat evenly and make sure it wouldn't suddenly boil. It started to bubble very gently at the edges and the vanilla seeds had broken free of the pod giving that lovely speckly appearance that only real vanilla produces. Heaven already.

The recipe said to do this until the crème anglaise thickened a little but didn't give an indication of how long this would take. I felt that my crème anglaise had thickened a bit pretty much immediately but I was sure it was supposed to be cooked longer than this and become a bit thicker still so I kept going. After about 6 or 7 minutes I thought it was done so I removed it from the heat and poured it into a glass bowl to cool. I placed this bowl in another bowl with ice in it to speed up the cooling process and stirred it periodically as instructed to stop a skin from forming. By this point my kitchen smelt like a little corner of heaven. Is there anything more divine than the aroma of vanilla? It's a good job I didn't have a crumble or pie anywhere near or we might have got no further and crème anglaise would have simply disappeared as it was.

Once the crème anglaise was cool I removed the vanilla pod, added the double cream and stirred it well through. The recipe calls for an ice cream maker but I don't own one so I had to resort to the freezing and whisking method. I put the mixture in a plastic tub and froze it for half an hour before whisking it with a fork. I repeated this after another hour and then again after a further hour before leaving it for a final proper freeze overnight.

Each time I whisked the ice cream I took great pleasure in licking the fork afterwards (don't worry I used a clean one each time) getting the tiniest taster of the amazing flavour I had managed to create. I really was so impressed at the succulent richness of the ice cream and it was obvious that the high quality vanilla pod I used was shining through in all its glory. Even before it was frozen I was planning dinner parties in my head where I could show off my amazing home made ice cream and receive the wondrous adulation of my most food critical friends. Yes, yes I know. Get over yourself Amy, you're only following someone else's recipe, the credit really belongs to Michel Roux.

So what of the finished product? Well it is BEAUTIFUL. This ice cream is rich and decadent - the sort where you only want one or two scoops and you savour it slowly, enjoying the smooth, creamy texture and the deep, rich flavour. To throw large quantities down your throat in a rush would be insulting to the quality and depth of it, it deserves to be appreciated fully. It's important to use a really good vanilla pod for this and not just an extract or essence. The flavour would be lacking and a bit of a waste of your efforts considering it does take quite some time to make. It's been said time and time again in baking that it's important to use high quality ingredients and this is even more true when there are so few of them.

Your personal challenge sounds like a great idea! I've never made my own ice cream but you've inspired me to give it a go. This looks great and vanilla ice cream is so versatile. You'll definitely impress with your homemade version.
ReplyDeleteThank you so much. I must admit when I started to eat it I was wondering why on earth I haven't done this before! It's worth the effort for sure
DeleteThis comment has been removed by a blog administrator.
ReplyDelete