
I'm really excited today. Not only am I baking and writing my first proper blog post but I'm making something that is my own idea and creation. The idea has been building all week and finally today I'm putting it into practise.
The inspiration is Millionaire's Shortbread, or caramel squares, whichever you prefer to call them. These are a firm favourite in our house but we usually buy them and stock up from a particular shop in the Lake District that does them brilliantly. I've only made them once before and it didn't go that well. I halved the shortbread mixture but failed to reduce the cooking time, my caramel was too runny, and the first lot of chocolate topping I made got water in it and split. Disaster overall.
I have a pyramid shaped chocolate mould and I thought it would be fun to use it to make chocolates that include all the essential elements of Millionaire's Shortbread. A chocolate shell with broken pieces of shortbread inside and caramel filling the gaps. For an extra touch and a more interesting appearance I decided to smash honeycomb into small pieces and make a little crust on the chocolate.
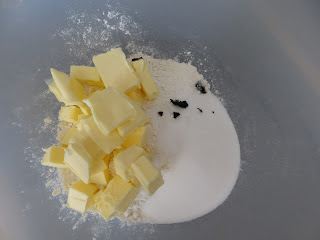
I started by making the shortbread using Simon Rimmer's recipe which is part of his Millionaire's Shortbread instructions. You can find the full recipe here. I loved the sound of this recipe as it includes my favourite ingredient - vanilla. I weighed out all the ingredients, split a vanilla pod and scraped out the seeds then used my hands to rub everything together. Eventually this created a ball of lovely smooth dough which already smelled wonderful. Look at those beautiful vanilla seeds! Ages ago I bought some incredible Madagascan Vanilla Pods to make my own vanilla extract so I had plenty left to use here. Individual vanilla pods are really expensive but if you buy them in bulk they're far better value.


Once I'd got my dough into a ball I greased and lined my baking tin, Simon Rimmer suggests using an 8in square tin so that's what I did. I pushed and flattened the dough into the tin, pushing it into the edges and getting it as even as possible. By this point I was already really happy, the dough felt wonderful to work with and seeing the little vanilla seeds dotted all over put such a smile on my face.
I pricked the dough all over with a fork and then put it in the pre-heated oven at 180 degrees for five minutes before reducing the temperature to 150 degrees. It now had to bake for a further 35 minutes so I got on with creating my chocolate shells.
First of all I took a Crunchie bar, cut off the chocolate so I just had honeycomb, put it in a small plastic bag and smashed it up. I took the crumbs and put a small amount in each of my moulds. As well as my pyramid mould I used half of a cake pops mould so that I could make enough chocolates. Now for the chocolate cases.


Now chocolate melting and me really don't get on. It's comparatively easy to do but at the same time it's pretty easy to mess it up and boy did I mess it up. My first lot I simply melted far too quickly and it turned into a horrible, lumpy mess. Fortunately I had a second bar ready (this is not my first time you see) and this time, after a lot of crashing around the kitchen in a strop and muttering to myself about my stupid electric hob, I did manage to get something usable, although it was a close call as I yet again overheated it. One day I will learn.

Whilst I was messing around and wasting entire bars of chocolate my shortbread finished cooking and this cheered me up no end as it looked and smelled fantastic. I left it in the tin to cool and once both the shortbread and the chocolate had cooled I got on with the next stage - yummy salted caramel.
Salted caramel is all the rage at the moment and I adore it. I searched the web for a caramel recipe that uses cream rather than condensed milk as I prefer it and settled on Nigella's caramel sauce recipe for my chocolates. This turned out to be an awesome decision.
I added light brown sugar, caster sugar, unsalted butter and syrup to my saucepan and melted them all together, stirring occasionally. I brought the mixture to a simmer and let it do its thing for 3 minutes with an occasional stir to stop it from burning. I then added my cream and salt. Nigella asks for Fleur de Sel but I couldn't find this in my local supermarket and as I've seen sea salt used in lots of other recipes I opted for this instead.


Once the cream and salt were added I gave the mixture a really good stir and then left it to cook for another minute or two. I didn't want my sauce to be too runny so I probably gave it two minutes in the end before removing it from the heat as the longer you leave it the darker it goes and the thicker it will be when it cools.
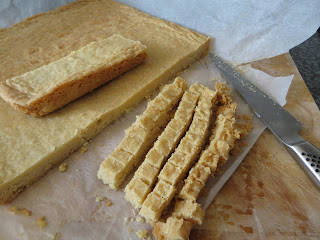
Whilst it was cooling a little I cut up some of the shortbread and added it to my chocolate moulds. Of course they didn't hold a huge amount so I had loads left over to eat on its own, hurrah! I 'tested' some as I went along just to make sure, it's the bakers prerogative I believe.


I then spooned the caramel into the moulds until they were almost full and left them to set. Finally I melted a little more chocolate, very slowly this time (and without any drama or crashing around) and spooned it on to the caramel to make a bottom for the chocolates.


By this point I'd probably been in and out of the kitchen for about four hours and we were supposed to be leaving to go to a friend's BBQ. I put the chocolates in the fridge for 10 minutes for a quick cool down (I've got a real thing against putting chocolate in the fridge), and then placed them carefully (pretty much threw) them into a cool bag still in their moulds and put them in the car.
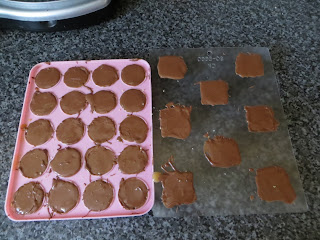
Once we got there I turned them out on to a glamorous paper plate and put them in front of my friends for judgement. The honeycomb didn't really work as planned, a good amount of it fell off when I turned them out as it hadn't made much contact with the chocolate. The cake pop moulds were a little better for this with their rounded shape but next time I will come up with a different decoration I think.
.JPG)
However the proof is in the tasting and these got a huge thumbs up all round. All the individual elements came out really well so appearance aside they were a big success. The shortbread gave a lovely crunchy texture, the caramel was perfectly salty and so moreish, the chocolate was Cadbury's and the honeycomb did add a delicious little pop. I'll definitely be making these again. They certainly didn't last long and that's about as big a compliment as you can get.
Yum! I love this idea. Shortbread, caramel, honeycomb AND chocolate - heaven!
ReplyDeleteIt pretty much was how many of my favourite things can I get in one mouthful!
Delete